Video by School of Rock explaining the set up process
1. Know The 3 Main Parts
- Drums: Bass (kick), snare, toms (mounted and floor)
- Hardware: Stands, bass pedal, hi-hat stand, throne
- Cymbals: Hi-hats, crash, and ride
2. Set Up The Bass Drum
- Place it centered in front of you
- Adjust the legs so they’re equal and dig into the floor (Helps if you use a carpet)
- Prevents wobbling and sliding
3. Attach The Bass Drum Pedal
- Hook it to the bass drum hoop
- Step on it — the beater should strike the center and bounce back
- Adjust spring tension if it’s too stiff or too loose
4. Position The Snare
- Place it between your legs, slightly above your thigh level
- Flat or slightly angled away
- Keep the snare throw-off (the lever) on the left side
5. Set Up The Toms
- Mounted toms: Slightly angled toward you, above the bass drum
- Floor tom: To your lower right, around snare height
- Adjust angles for comfort and reach
6. Set Up Your Drum Throne
- Sit so your knees are slightly below your hips
- Ensure you can reach all drums and cymbals without overreaching
7. Position The Hi-Hat
- To the left of the snare
- Top cymbal attaches with a clutch
- Should sit higher than the snare and be easy to reach with your foot and stick
8. Arrange Crash And Ride Cymbals
- Ride cymbal: To the right, just over the floor tom
- Crash cymbal(s):
- First crash: Between snare and mounted tom (left)
- Second crash (if any): Between mounted and floor tom (right)
- Keep cymbals close and low enough for easy reach
Pro Tips:
Don’t set things too high — keep everything within natural reach
Make small adjustments over time to suit your body and playing style
Comfort = better playing and less fatigue

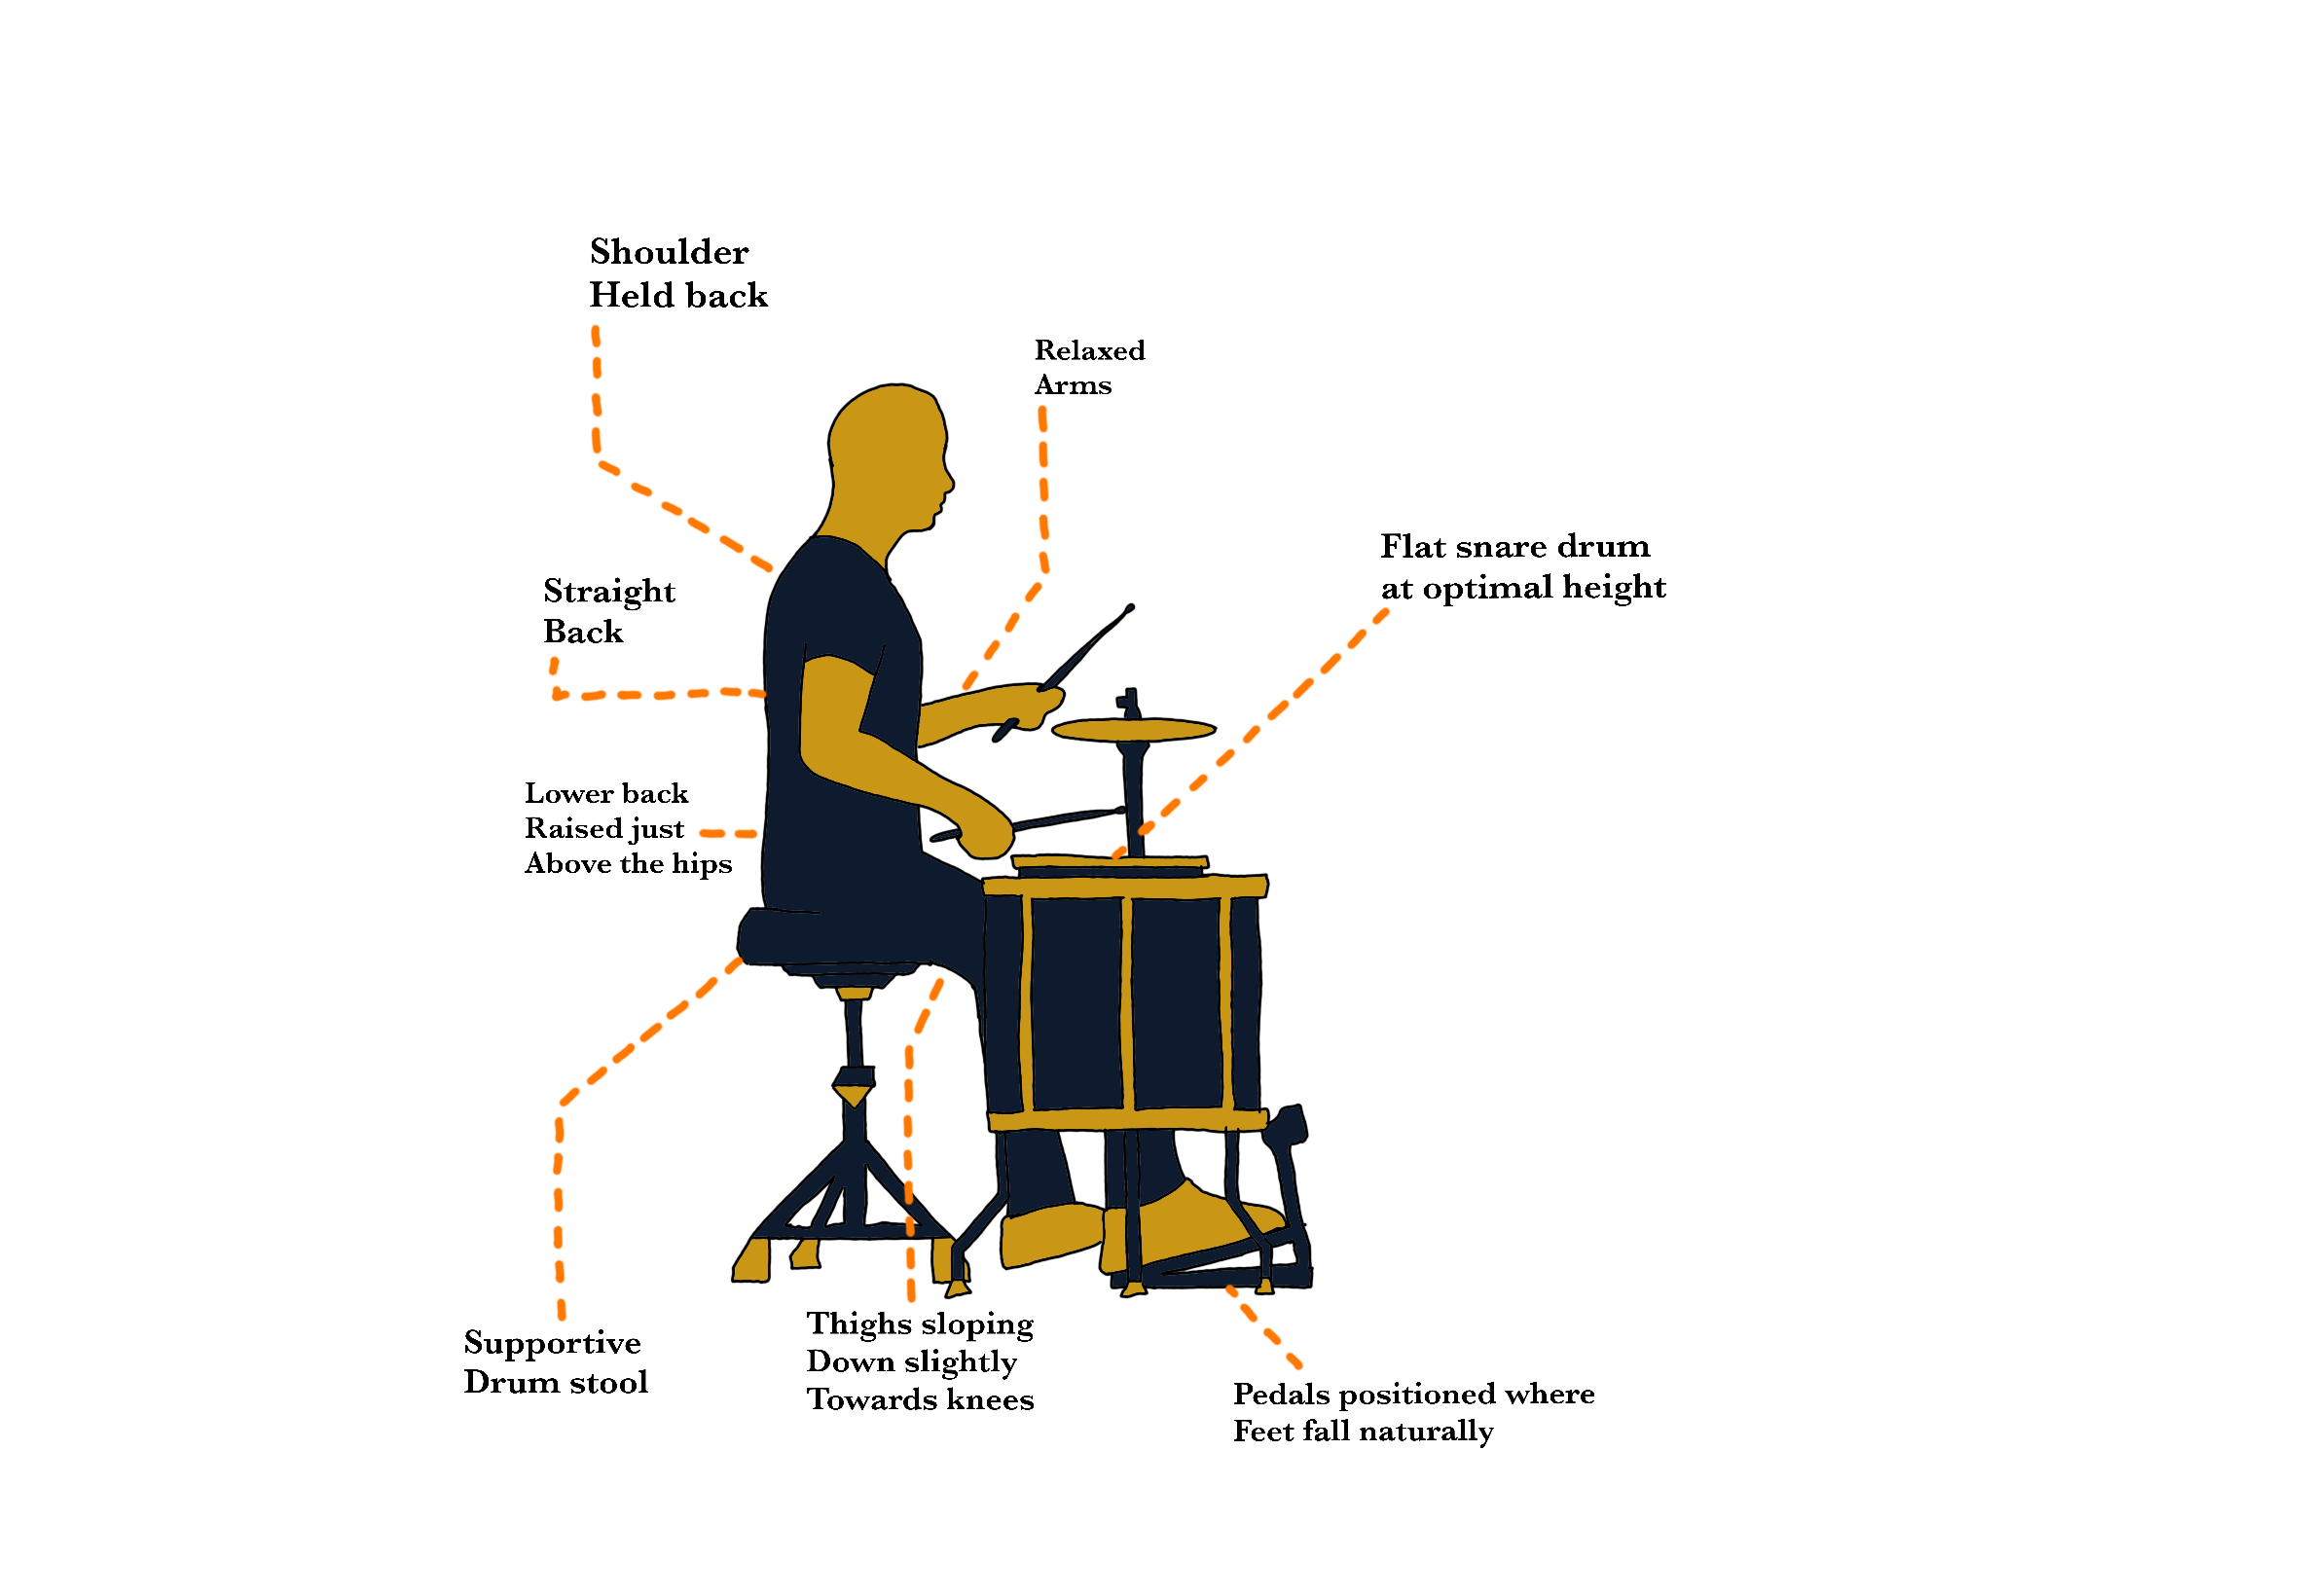
Drum Kit Posture
Playing drums isn’t just about rhythm — it’s also about how you sit and move. Good posture helps you play better and avoid injury. Here’s a simple guide to help you get started:
1. Sit With Your Back Straigth
- Keep your back upright — don’t slouch.
- Slouching can strain your lower back over time.
- Watch professional drummers to see what good posture looks like.
- If sitting straight is difficult, consider a drum throne with back support.
2. Adjust Your Drum Throne Height
- Your thighs should be at a 90° to 110° angle.
- Too high or too low? You’ll tire your legs and struggle with the bass drum.
- Adjust the seat until you’re comfortable and balanced.
3. Keep Your Arms Relaxed
- Keep your elbows tucked in and your arms close to your sides.
- This gives you a more natural, controlled drum stroke.
- Avoid lifting your arms too high — it can make your playing feel stiff or forced.
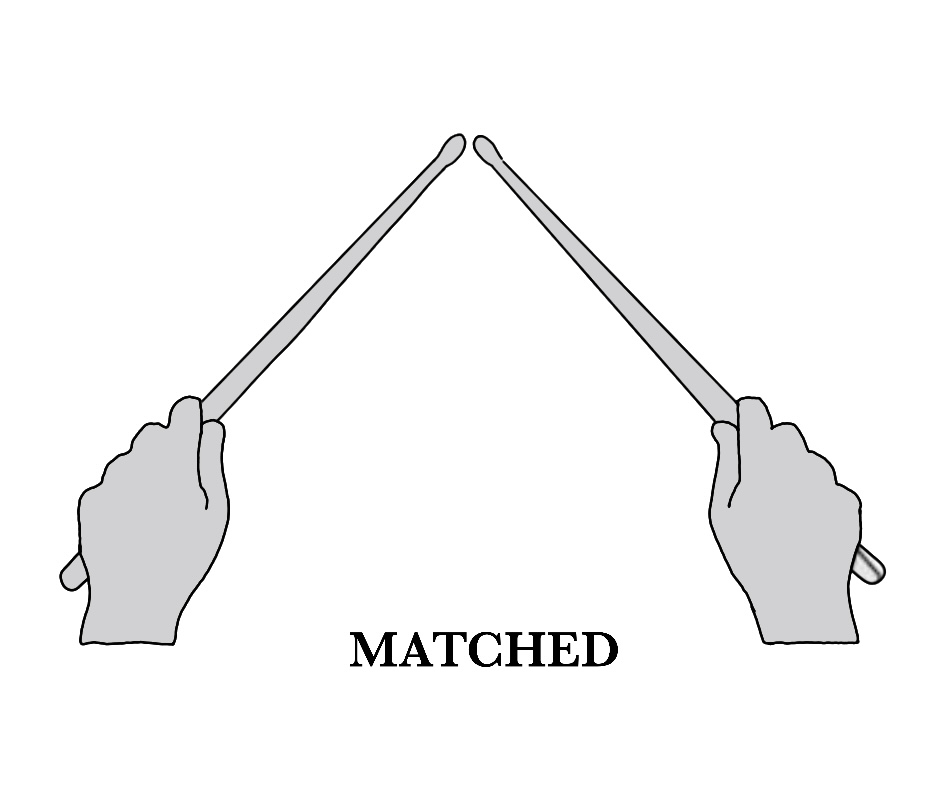
Drumstick Grip
How you hold your drumsticks affects your control, speed, and power. There are two main ways to hold drumsticks: traditional grip and matched grip.
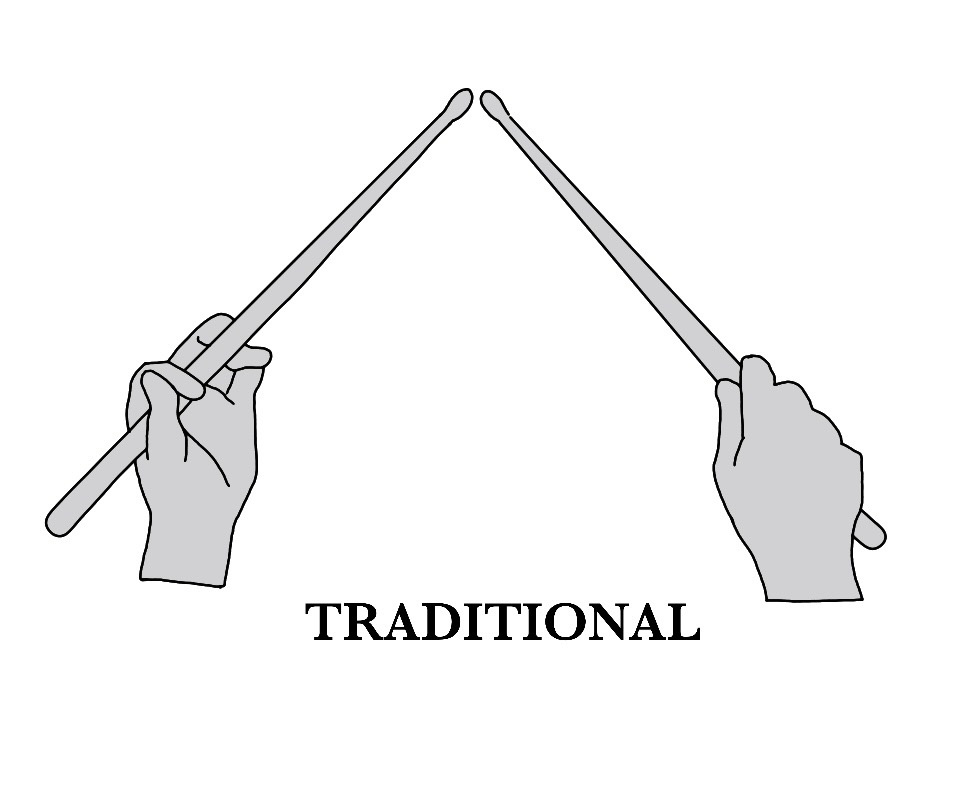
Traditional Grip
- Right Hand: Holds the stick overhand (like holding a hammer).
- Left Hand: Holds the stick underhand, with it resting between the middle and ring fingers.
- Used in: Jazz, marching bands, and some classical styles.
- Why use it: Offers finesse for lighter styles and works well on angled drums (like snare drums in marching).
Matched Grip
- Both hands hold the sticks the same way — overhand, between your thumb and index finger.
- Used in: Most modern drumming styles (rock, pop, metal, etc.)
- Why use it: It’s easier to learn and provides consistent control with both hands.
Quick Tips
- Hold the stick loosely — don’t choke it.
- Let the stick bounce naturally.
- Start slow and build control before adding speed.